
Uncategorized
Blur Cb Background HD: Full Guide for Photo Editing Lovers
Blur Cb Background HD: Full Guide for Photo Editing Lovers
Photo editing is becoming a normal part of everyday life in India. Whether someone wants to upload a stylish DP, create a portrait photo, edit a reel cover, or design a thumbnail, a clean and soft background always makes the photo look professional. That is where Blur Cb Background HD comes in. These backgrounds are used by editors to give a DSLR-style depth effect, soft bokeh, and cinematic mood without using an actual professional camera.
In this article, we will understand what exactly Blur Cb Background HD means, how it helps in editing, how many types are there, how weather and lighting affect blur quality, and how you can use the blur background you shared to create high-quality portrait edits in apps like PicsArt, Photoshop, and Lightroom.
Table of Contents
What is Blur Cb Background HD?
Blur Cb Background HD is basically a high-resolution background image that is intentionally blurred to create a soft, clean, and professional-looking depth-of-field effect. The “CB’’ stands for “Creative Background,” a term widely used in the Indian editing community. These backgrounds usually include nature scenes, city lights, outdoor locations, forest areas, or sky shots with smooth Gaussian blur or lens blur.
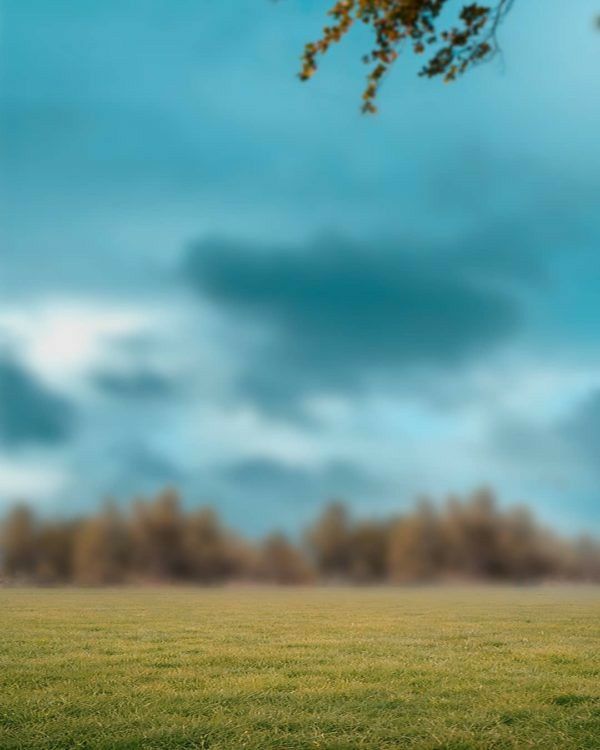
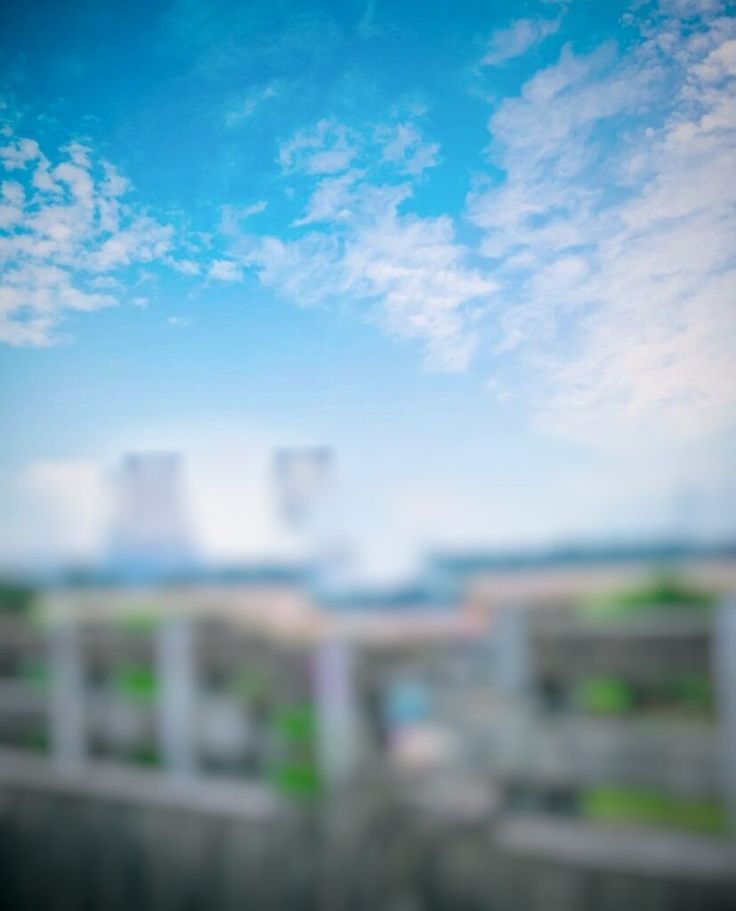
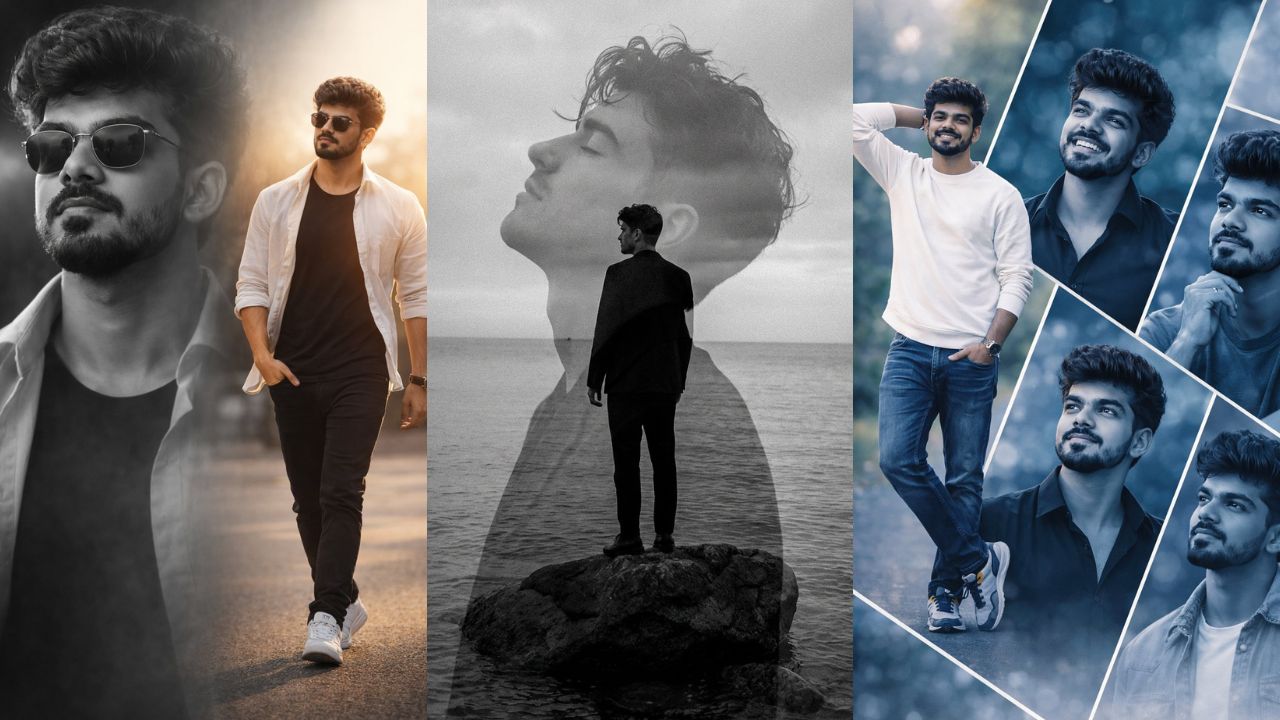
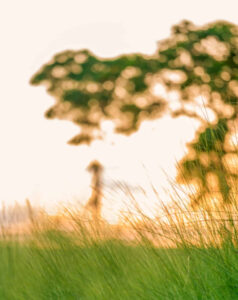
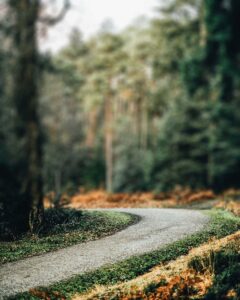
The blur helps to remove distractions from the background and allows the subject—usually the boy in the photo—to stand out clearly. The background image you shared also shows a soft blur mix of natural scenery with blue sky and green forest, which makes it perfect for portrait-style edits.
Why is Blur Cb Background HD Useful?
Blur Cb Background HD is widely used because it makes a normal photo look like it was taken with a DSLR camera. When the background is blurred, the main face becomes more attractive and more attention moves toward the subject. Many editors prefer this because it makes Instagram, Facebook, and WhatsApp DP photos look premium.
Another benefit is that blur backgrounds hide messy areas, unnecessary objects, and low-quality surroundings. Even if a photo was taken in a normal location like a home or street, adding a blurred background makes the final output look like a professional outdoor shoot.
Blur also helps create mood. For example, a warm blur feels cinematic, a cold blur feels calm, and a forest blur feels natural.
Types of Blur Cb Backgrounds
There are many types of Blur Cb Background HD images, and each type gives a different mood to the edit. Let’s understand them in detail.
1. Nature Blur Background
These include trees, forests, mountains, rivers, sky, and grass areas. The image you provided belongs to this category. Nature blur gives a fresh and peaceful vibe and works well for portrait editing, fashion posts, and Instagram photos.
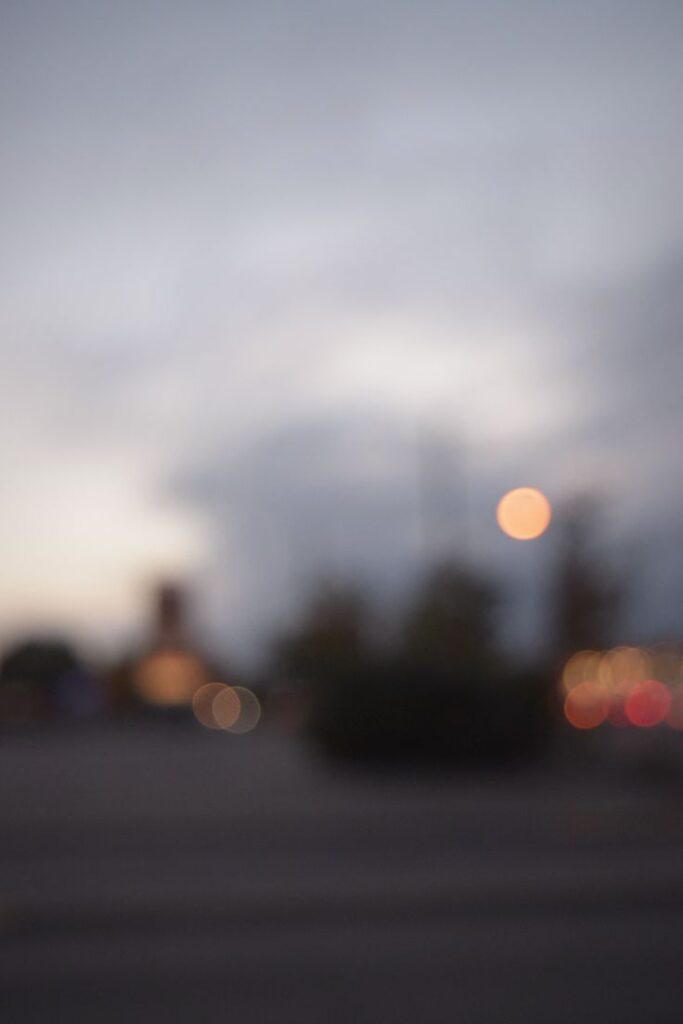
2. Bokeh & Light Blur Background
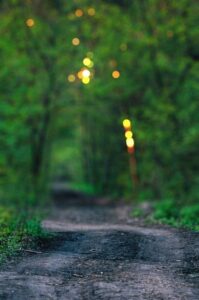
Bokeh blur shows glowing circles of light. These are especially popular in night photography edits. They add a dreamy, aesthetic look. Editors often use these for festival photos, couple edits, birthday edits, and reel thumbnails.
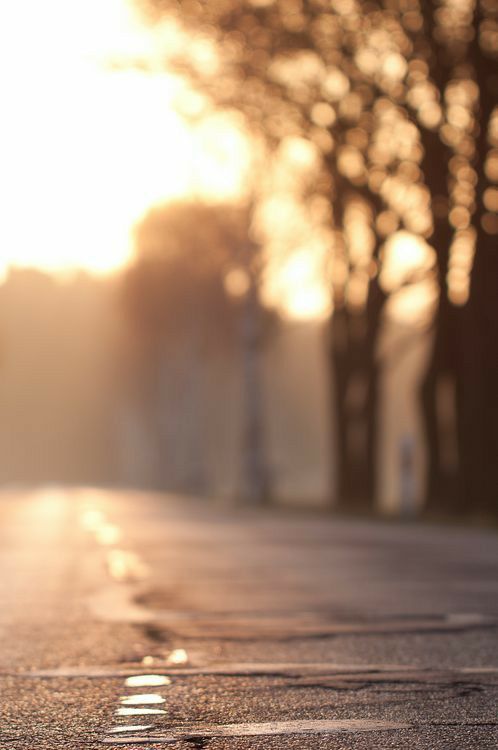
3. City Blur Background
This includes blurred buildings, cars, roads, street lights, and urban scenes. They are used for stylish street-style portraits or male model edits. A city blur gives an energetic and modern feel.
4. DSLR Lens Blur Background
This type tries to copy the natural lens blur produced by real cameras. They usually look very smooth around edges and are perfect for realistic portrait editing.
5. Gradient & Color Blur Background
These are simple blurred colors, like blue-to-white or pink-to-purple. Editors use this for minimalistic edits where they want the face to pop without any scenery behind.
How to Use Blur Cb Background HD in Editing
Using Blur Cb Background HD is simple, but making the final edit look natural requires proper technique. When you edit a photo, the background should match the lighting, angle, and color tone of your original subject image.
Most editors follow this easy workflow:
-
Import background
-
Cut out subject
-
Match light
-
Add shadow
-
Color correct
-
Add final effects
But let’s explain everything in clear detail so that any beginner can understand how to use Blur Cb Background HD perfectly. Here is some background you can use it.


Blur Cb Background HD: Full Guide for Photo Editing Lovers
Putting Subject Properly
Place the person in the middle or slightly to one side depending on the background composition. The negative space (empty area) should be behind the subject so the blur enhances the portrait.
Matching Light and Shadows
If the background is bright like the blue sky in your image, then the subject must also have matching brightness. When these do not match, the edit looks fake. Gentle shadows under the chin or on the ground make it look more realistic.
Blending Edges Smoothly
Even when you cut the subject carefully, the edges sometimes look too sharp. Using a soft eraser or feathering tool helps blend the edges so the subject looks naturally placed in the blur background.
Color Grading for Natural Look
Use tools like PicsArt Curves, Snapseed Tune Image, or Lightroom Color Mix to match the color of the subject with the background.
A background with cool tones should have a slightly cool-toned subject.
Weather, Camera Angle & Light Impact on Blur Backgrounds
Weather plays a big role in how blur looks. For example, in bright sunny weather, blur backgrounds look more sharp and vibrant. In cloudy or misty weather, blur backgrounds appear softer and more cinematic. The sample image you gave has a misty forest and bright sky, which creates a balanced soft blur.
Camera angle also changes how realistic the final edit appears. If the background image is shot from a low angle and your subject photo is shot from a high angle, the final edit will look mismatched. Always match angle-to-angle.
Light direction is also important. If sunlight in the background is coming from the left, then the subject should ideally show light on the same side.
All these things combined create a perfect portrait edit that feels natural and pleasing to the eyes.
Tips for Using Blur Cb Background HD
Here are a few simple tips to improve your edits without using too many bullet points:
-
Always use HD or 4K blur backgrounds to avoid pixel breaking.
-
Match color temperature so the edit looks natural.
-
Keep the subject slightly sharp and the background fully soft for best depth effect.
-
Add a little shadow below the subject’s feet or around edges.
-
Do not over-blur; use natural amount to keep realism.
Conclusion
Blur Cb Background HD is one of the easiest and most powerful tools for creating clean, professional, DSLR-style portrait edits using only a mobile phone. It naturally shifts attention to the subject and hides unnecessary elements from the background. Whether you are editing for Instagram, thumbnails, DPs, or commercial use, blur backgrounds always give a premium finish.
Your uploaded background is perfect for soft portrait edits because it has natural colors, misty forest, and a bright sky that blends well with most skin tones. With the right lighting match, angle, and color correction, anyone can create high-quality photos quickly.
FAQs
Q1. What is the use of Blur Cb Background HD in photo editing?
Blur backgrounds help create depth, highlight the subject, and give a DSLR look even with normal mobile photos.
Q2. Can I use Blur Cb Background HD for portrait photography?
Yes, these backgrounds are widely used for portrait, fashion, model, and DP editing because they make the subject stand out clearly.
Q3. Which apps are best for using Blur Cb Background HD?
PicsArt, Photoshop, Lightroom, Snapseed, and Remini are commonly used apps.
Q4. How do I select the perfect blur background?
Choose a background matching your light direction, color tone, and camera angle for the most natural result.


Uncategorized
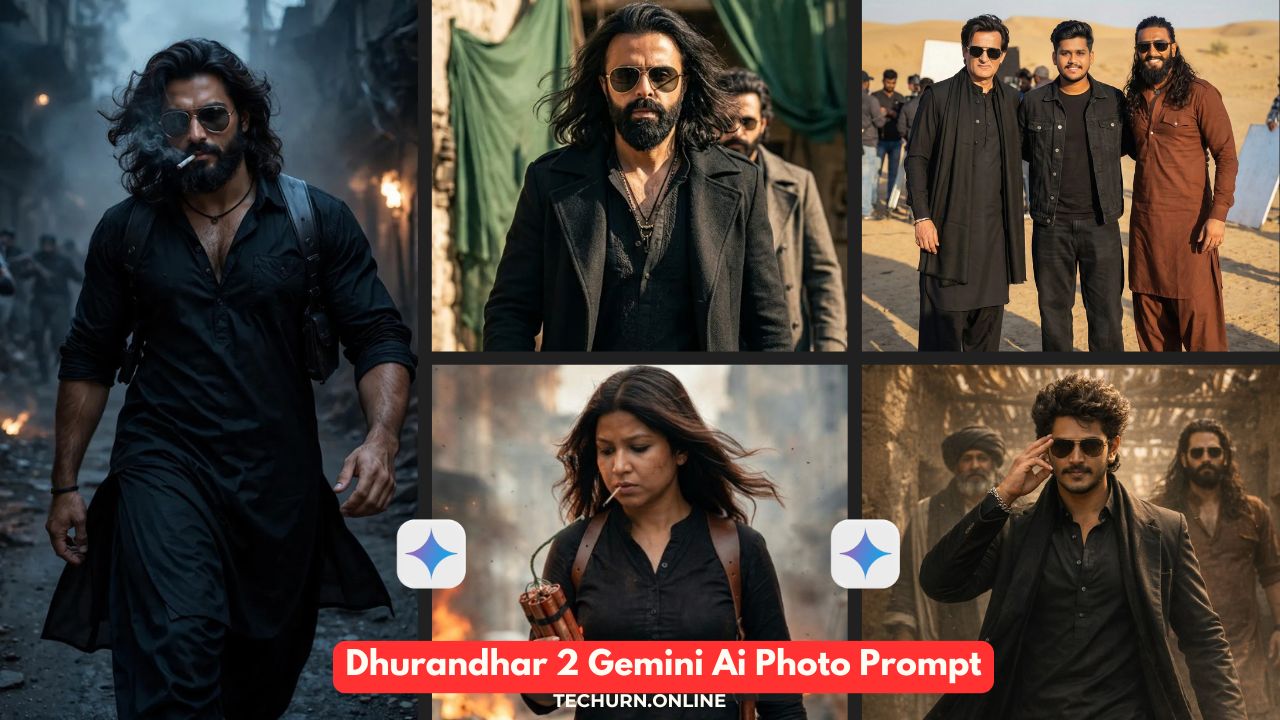
Akhanda 2 Review : A Powerful Comeback with Mass Action, Story Highlights & Full Analysis

Introduction: Why Everyone Is Talking About Akhanda 2
Akhanda 2 has become one of the most discussed Telugu films this season. After the popularity of the first part, many people were waiting to see how Nandamuri Balakrishna would return as the Aghora character. Director Boyapati Sreenu has brought back the same style of loud action, strong dialogues, and temple-inspired background score that the audience remembered from the first film. But the real question is: does Akhanda 2 meet the expectations?
In this Akhanda 2 Review, let’s go through the story, performances, audience reactions, critic opinions, and the early box-office mood.
Story Continuation & Emotional Beginning
The movie picks up from where the earlier part ended. It starts with an emotional sequence that shows how common people still struggle under corrupt groups and criminal networks. When there seems to be no one left to support them, Akhanda steps in again. This time, the director has added a stronger spiritual element along with the action. Many viewers felt that the temple culture and traditional touches blended more naturally in this film. The pacing includes many intense moments, keeping the viewers connected with the central theme.
Akhanda 2 Review : A Powerful Comeback with Mass Action, Story Highlights & Full Analysis
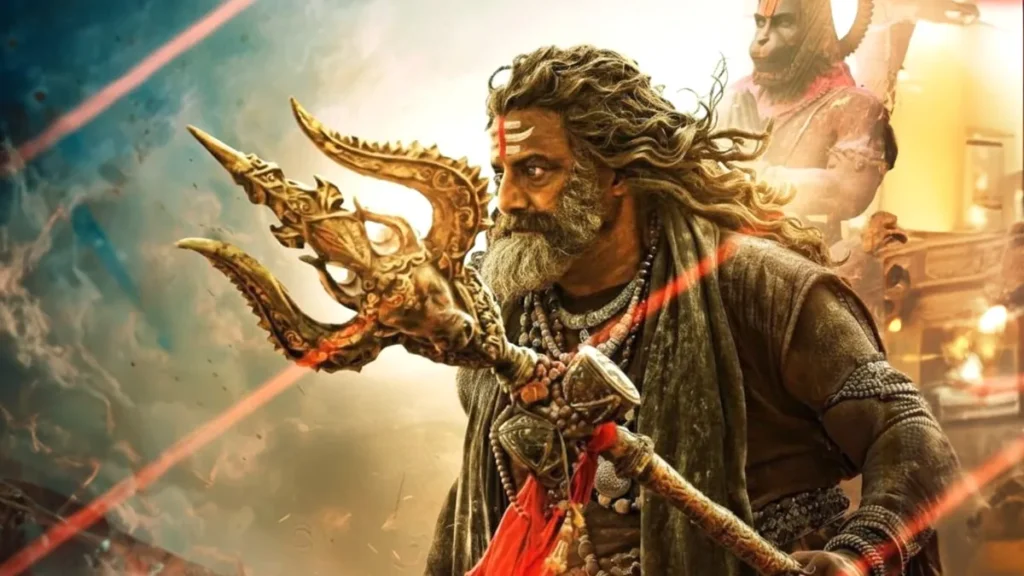
Balakrishna’s Screen Presence
Balakrishna’s performance is easily the highlight of the film. His expressions, body language and the Aghora look create a strong impact on screen. People inside theatres said that his very first appearance brought whistles and claps. Many early watchers shared that chants of “Jai Balayya” started even before the interval. The director clearly planned several high-energy scenes that give fans what they expect. Thaman’s background music is loud, but it suits the tone and helps build the intensity of action scenes.
Stronger Villain and Clear Message
Compared to the first film, the story here tries to go deeper. The villain role is written better and gives more weight to the conflict. The emotional connections between characters feel clearer as well. The flashback scenes explain why Akhanda has to come back again and set up the main conflict. The movie also sends a message about standing against injustice and protecting dharma. While some critics feel the story is predictable, most mass-movie fans enjoy it because the presentation is engaging and straightforward.
Critics Speak: Akhanda 2 Review GreatAndhra & IMDb Opinion
Akhanda 2 Review : A Powerful Comeback with Mass Action, Story Highlights & Full Analysis
Many movie lovers searched for Akhanda 2 review GreatAndhra, and the website mentioned that the film delivers solid mass moments and keeps fans happy. They liked the spiritual parts and the improved production value but felt that certain portions were a bit long.
On IMDb, early reviews under Akhanda 2 review IMDb appreciated the action design and Balakrishna’s presence. The initial ratings looked mixed, but more positive fan reviews have slowly lifted the score. Most IMDb users praised the visual improvement and the effort put into the fight sequences.
How Real Audience Reacted
People who watched the movie on the first day said that Akhanda 2 is clearly made for viewers who enjoy commercial action films. If someone likes punch dialogues, energetic music and dramatic action scenes, this film gives them that experience. Several young viewers noted that the visuals look better than the first part, especially the temple fight and scenes involving Aghora elements.
A few people felt that the level of violence could have been toned down, but overall, the general reaction from theatres has been positive.
Akhanda 2 Release Date & Theatre Atmosphere
When Akhanda 2 finally released, theatres in the Telugu states saw festival-like celebrations. Advance bookings were strong, showing how much interest the film had created. Fans decorated theatres, did special poojas and celebrated early morning shows. Social media was full of videos showing people dancing and cheering during Balakrishna’s scenes. This helped the film get a very good opening on day one.
Akhanda 2 Collection: Early Box Office Buzz
Talking about Akhanda 2 Collection, the initial numbers look healthy. Many shows, especially morning and evening ones, ran housefull in several regions. Trade experts mentioned that the film has the strength to bring in a solid first weekend. The popularity of the first part and Balakrishna’s loyal fan base both helped the sequel’s opening.
Reports also said that the overseas premiere collections were better than what many expected. The movie is performing strongly in mass centres and tier-2 towns, where such films usually do well.
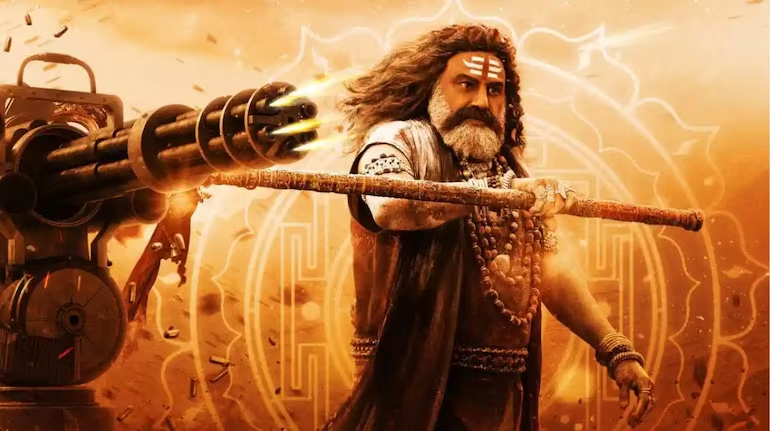
Emotional Moments & Presentation of the Aghora Character
The emotional angle in Akhanda 2 is getting a good response as well. The film spends more time on the backstory and the message related to dharma. Many viewers mentioned that the temple scenes and spiritual conversations felt impactful. Balakrishna’s Aghora look remains the strongest part of the film. His voice, expressions and serious presence make the character appear intense and powerful.
Drawbacks That Stand Out
Like any film, Akhanda 2 also has its drawbacks. Some critics said that the film has more action than required and the length could have been shorter. A few action scenes feel repetitive because of the slow-motion shots used repeatedly. If someone is not used to mass films, the style may feel too loud. However, Boyapati Sreenu is known for this approach, and he stays close to his usual style here.
Final Verdict: A Solid Mass Entertainer
Akhanda 2 Review shows that the film delivers what its audience expects — strong action, spiritual elements and Balakrishna in a powerful role. The visuals, villain’s role, and emotional scenes add more value compared to the first film. The early response, social media reactions and box-office opening all suggest that Akhanda 2 has connected well with its target viewers.
Conclusion: Worth Watching for Mass Cinema Lovers
To sum it up, Akhanda 2 does not try to be realistic or subtle. It stays true to the mass-cinema approach with loud moments, strong dialogues and spiritual energy. Whether you read Akhanda 2 review GreatAndhra, Akhanda 2 review IMDb or look at social media posts, the general opinion is similar — the movie gives what it promises. With the positive start and consistent fan support, Akhanda 2 Collection is expected to continue growing.
If you enjoy high-energy entertainers, this film is definitely better to watch on the big screen.
Nature Background HD – Free HD Nature Wallpapers & Backgrounds
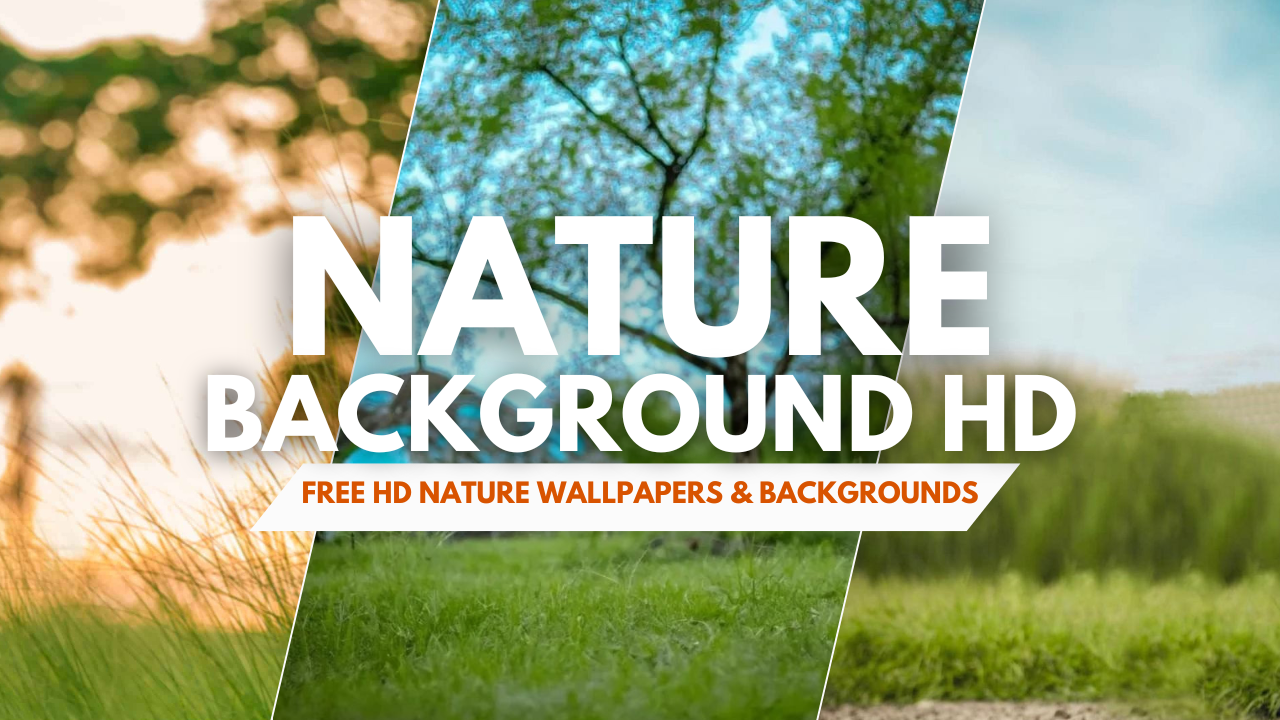
Nature always gives a different type of peace. When we see green trees, open fields, village huts, or clear blue sky, our mind becomes light. Today many people use nature background hd for photo editing, phone wallpapers, thumbnails, and social media posts. These backgrounds look simple, clean, and natural. A good nature background has soft colors, clear details, and a peaceful feeling.
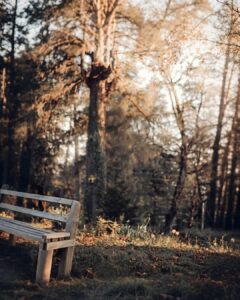
The image you shared also shows a very calm natural place with a big tree, green grass, and a small hut. It gives a fresh mood which is perfect for editing or wallpaper use.
In this post, we will understand what is nature background hd, why people like it, how photographers take nature background photos, and what things matter like weather, lighting, and camera angle. Everything is explained in very simple Indian English that anyone can understand.
Table of Contents
-
What is Nature Background HD?
-
Why is it Useful / Benefits?
-
Main Content About Nature Background HD
-
Weather Importance
-
Lighting Importance
-
Camera Angle
-
Tips / Examples
-
Conclusion
-
FAQs
What Is Nature Background HD?
A nature background hd means a high-quality picture of a natural place like trees, fields, mountains, rivers, clouds, or village views. HD means the photo is very clear and sharp. Even if you zoom in, the photo does not break. Many people use nature background hd for editing, wallpapers, CB edits, posters, and social media posts.
The photo you shared has a big tree, green grass, and a small hut. This type of picture is perfect for nature background hd because the colors are soft, nothing is too bright, and it gives a calm and fresh feeling. Anyone can use it behind their portrait photo or use it as wallpaper.
Why Is It Useful / Benefits?
Nature backgrounds are useful because they look simple, beautiful, and natural. These backgrounds match with almost any photo. Portrait photos look very good when the background is nature because it doesn’t distract the viewer.
Here are some easy benefits:
-
Gives soft and clean look
-
Perfect for CB edits and normal editing
-
Natural colors look good in every light
-
Good for mobile wallpapers
-
Looks peaceful and eye-friendly
-
Works for all types of photos: boys, girls, kids, outdoor, etc.
-
Nature never looks fake, so editing looks natural
These benefits make nature background hd very popular among normal users and editors. Here is some background you can use it.


Main Content About Nature Background HD
Nature background hd is loved because nature already looks beautiful. You don’t need to add extra filters or effects. A simple tree, cloud, or grass can make the whole photo look great.
Photographers also learn many things while taking nature photos:
-
how light falls on leaves
-
how shadows change in morning and evening
-
how sky color changes
-
how angle changes the look
-
how foreground blur makes photo better
The image you gave is also a good example. The sky is soft, the tree branches look natural, and the hut gives a village atmosphere. Together, they create a perfect nature mood. These types of backgrounds feel real and fresh.
Nature backgrounds also help beginners practice photography. They learn how to take clear photos, how to keep frame clean, and how to find good light.
Many editors use nature background hd because it blends well with cutouts of models. Green and brown colors make editing look natural.
Nature is free and everywhere. You don’t need big camera gear. Even a simple mobile camera can take good nature backgrounds if used in correct lighting.
Weather Importance
Weather changes the full look of a nature background. Weather is the biggest key in nature photography. Every weather gives different colors and mood.
Types of weather and their effects:
Clear sky:
Colors become bright. Tree leaves look shiny. But sometimes light becomes too harsh.
Cloudy weather:
Best for nature background hd. Soft shadows, soft colors, no harsh light. Leaves look more green. Sky looks smooth.
Rainy season:
Everything becomes fresh. Colors become deep. But light can be low.
Morning weather:
Best time for warm golden light. Nature looks very calm.
Evening weather:
Golden hour again. Sky becomes soft orange. Perfect for warm nature photos.
Photographers always check weather before clicking photos. Bad weather can spoil colors. Good weather gives perfect hd nature background.
In your image, the weather looks soft and pleasant, which makes the whole scene peaceful.
Lighting Importance
Lighting is the heart of nature photos. Without good light, photo will not look hd even if your camera is good.
Important things about light:
-
Soft light is best for nature
-
Morning and evening light makes colors warm
-
Afternoon sun makes harsh shadows
-
Cloudy light makes greenery brighter
-
Sun direction changes entire mood
In your image, lighting is soft and diffused. That is why grass looks smooth and tree looks clear. Good light makes shadows soft and creates a balanced nature background hd.
If you want high-quality nature background photos, always choose soft and gentle light.
Camera Angle
Camera angle changes how deep and wide the background appears.
Simple camera angle ideas:
Low angle:
Makes grass stand out. Gives foreground blur. Tree or hut looks bigger and detailed.
Eye-level:
Simple and natural. Good for normal backgrounds.
Side angle:
Gives creative shadow look.
Slight tilt:
Adds depth and interest.
The image you gave looks like it was taken from a low angle. That is why the tree looks tall and detailed. Grass in the foreground is slightly blurred. This type of angle makes nature background hd look more cinematic.
Angles create story. Even a simple place looks amazing if clicked from right angle.
Tips / Examples / List
If you want to take good nature background hd photos, you can follow these easy tips:
-
Shoot in morning or evening
-
Avoid harsh afternoon sun
-
Keep frame simple
-
Do not add too many objects
-
Use a clean lens
-
Keep hands steady
-
Try low angle for depth
-
Keep horizon straight
-
Focus on main object like tree or hut
-
Keep some foreground like leaves or grass for depth
-
Avoid too much brightness
-
Try to shoot in cloudy light for soft colors
Even a normal village field or small hill can become a perfect hd nature background if clicked properly.
Conclusion
Nature background hd is one of the most liked photography styles because it shows real beauty. Nature always looks fresh and peaceful. When you use nature as background, your photos also look natural and clean.
The image you shared is a perfect example where everything fits nicely: tree, grass, hut, soft light, and natural atmosphere. With correct weather, lighting, and angle, anyone can click beautiful nature background hd images, even with a simple mobile phone.
Nature never goes out of trend. That is why editors, photographers, and normal users always search for good nature backgrounds.
FAQs
Q1. What is the use of nature background hd?
Nature background hd is used for editing, wallpapers, CB edits, posters, thumbnails, and social media posts. It gives a soft and clean look and makes the main photo look better.
Q2. When is the best time to shoot nature backgrounds?
Morning and evening are best because the sunlight is soft and warm. This light makes the background look smooth, natural, and beautiful.

Latest Picsart CB Background HD – Free & Stylish Editing Collection
Photo editing has become an essential part of the modern lifestyle. Whether someone wants to upload pictures on Instagram, change a DP on Facebook, design a YouTube thumbnail, or build a digital brand, everyone wants their photos to look stylish and premium.
Today, most editors work directly on their phones, and mobile apps like Picsart make editing easy for everyone. One of the most popular elements used in photo editing is the Picsart CB Background HD. These high-quality backgrounds help in creating creative, cinematic, and professional-looking images without needing an expensive camera or fancy location.
The picture you shared is a great example of a clean, natural CB-style background — calm green fields, a tall tree, soft focus, and pleasant weather make this scenery perfect for portrait, storytelling, and natural edits.
Before using any background, it’s important to understand how they help, how to select the right one, and how to use them effectively for personal or brand growth. Let’s go step by step.
Step 1: Do Research
Before downloading or choosing any Picsart CB Background HD, it’s smart to understand what it actually is and why people use it. When you understand the purpose, you’ll make better editing decisions.
What Is Picsart CB Background HD?
“CB Background HD” means a high-definition creative background designed for “CB-style” edits. The “CB” often stands for Creative Blur or Creative Background — an artistic, soft, and cinematic look that helps your subject stand out.
You can easily place your cut-out photo on these backgrounds to create DSLR-like results. They’re often available in styles like Full HD, 1080p, DSLR look, sunset tones, night lights, and more.
When you edit using Picsart, Snapseed, or Lightroom Mobile, these backgrounds make your images look polished and professional without much effort.
In the past, people had to go outdoors to capture such scenes. Now, you can simply apply digital backgrounds directly behind your photo — which explains why searches like 1080p Picsart CB Background HD, DSLR CB backgrounds, and full-size CB backgrounds are so popular.
Step 2: Clarify Your Purpose
When you plan to use a Picsart CB Background HD, first think about your goal. Are you creating an Instagram DP? A festival poster? A travel-style image? When you’re clear about your purpose, choosing the right background becomes much easier.
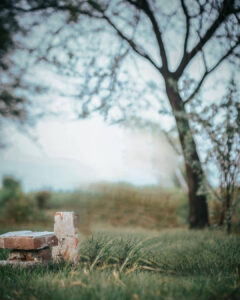
For example, the background you mentioned — with green grass, a stone seat, and a tall tree — works beautifully for solo portrait edits, storytelling photos, village-theme projects, or peaceful lifestyle posts.
If your page or brand is about nature, fashion, travel, or minimal storytelling, such natural CB backgrounds are ideal for your content.
Step 3: Compare Background Options
Once you understand what CB backgrounds are, the next step is comparing different types. There are several categories of Picsart CB Background HD, each with a unique style and mood.
Types of CB Backgrounds
-
Natural backgrounds: Fields, trees, gardens, and roads — perfect for realistic and calm edits.
-
City or street backgrounds: Popular for urban fashion, hip-hop, or night-light themes.
-
Sunset backgrounds: Great for warm, emotional, and cinematic looks.
-
Cool-tone backgrounds: Blue or grey tones that create dreamy, soft visuals.
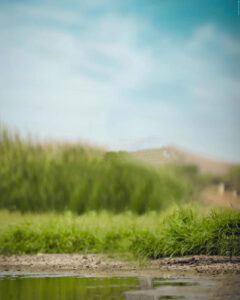
The photo you shared represents a natural outdoor scene shot from a low eye-level angle. The grass in front, gentle wind, and soft bokeh effect make it ideal for placing a portrait naturally.
Step 4: Understand Key Differences
Every background type offers a different aesthetic. Some look cinematic, some appear DSLR-shot. The main difference lies in resolution, color tone, weather, and camera angle.
What Makes a Good CB Background?
-
Resolution: Full HD (1920×1080) or higher ensures clean details and no pixel breaks.
-
Color tone: Neutral, soft colors help blend subjects easily.
-
Lighting: Balanced brightness makes your final photo realistic.
-
Depth: Slight blur in the background gives a DSLR-like effect.
A DSLR CB background usually has mild blur with a clear subject zone. A 1080p CB background offers excellent clarity for editing, and a full-size CB background can be used both vertically and horizontally.
Avoid low-resolution or over-edited files — they make your final photo look artificial.
Step 5: Choose the Right Background
After understanding and comparing, it’s time to pick the perfect one. When selecting your final Picsart CB Background HD, make sure its tone and light direction match your photo.
For instance, if your portrait is shot indoors but you use a bright sunny outdoor background, the result may look fake. So check angle, lighting, and shadows before applying.
The soft greenish background you shared blends beautifully with portraits taken in natural light.
Pro Tips:
-
Match color temperature of your photo and background.
-
Use open-space backgrounds for easy subject placement.
-
Adjust brightness and shadows for a realistic look.
Once you’ve chosen the right background, your final edit can be used for:
-
Display pictures (DPs)
-
YouTube thumbnails
-
Social media posts
-
Personal branding
-
Fashion or product content
Step 6: How CB Backgrounds Help Editors
A high-quality Picsart CB Background HD can instantly make an ordinary photo look cinematic. Instead of spending money on travel or studio setups, you can achieve a professional look with just your smartphone.
Benefits for Beginners and Creators
-
Saves time and cost
-
Creates a consistent editing style
-
Makes social media feeds look professional
-
Helps small creators build a visual brand identity
If you use similar tones (e.g., green nature or warm brown backgrounds), your audience starts recognizing your style — an important part of visual branding.
Over time, your followers will associate your edits with a specific mood or color palette — like orange-teal, dark cinematic, or nature tones.
Step 7: Match Backgrounds With Your Brand
Branding With CB Backgrounds
If you regularly use the same color tone and editing style, it becomes your brand identity.
For example:
-
Green nature look → calming, peaceful vibe
-
Brown warm look → cinematic, emotional mood
-
City lights → urban, nightlife theme
Consistency Tips
-
Use similar tones in each post
-
Maintain one editing style
-
Always use Full HD or better backgrounds
-
Avoid random low-quality downloads
Consistency makes your Instagram or YouTube thumbnails look professional and trustworthy — a key factor for growing followers and attracting brand deals.
Step 8: Background Weather & Lighting
Weather adds emotion to a photo. The atmosphere in the background sets the tone of your image.
| Weather | Editing Mood |
|---|---|
| Cloudy / Foggy | Emotional, cinematic, storytelling |
| Sunny | Bright, happy, energetic |
| Rainy | Romantic, dramatic |
| Golden Hour (Sunset) | Warm, dreamy, cinematic |
The background you shared has a slightly foggy, calm, and green tone — perfect for nature storytelling, couple edits, solo portraits, and festival designs.
When editing on such backgrounds, make sure your subject lighting matches. For example, if your original photo was shot in harsh sunlight, lower highlights before blending.
Step 9: Match Camera Angle for Realism
Camera angle plays a big role in achieving realistic results.
If your portrait is shot from eye level, choose a background taken from a similar angle. Using mismatched angles can make your subject look floating or misplaced.
The sample background you shared is taken from a low eye-level angle — grass in front, tree behind, soft blur. Place your cut-out slightly above the grass line for a natural effect.
Angle Tips:
-
Low angle → Makes subject powerful
-
High angle → Makes subject appear small or gentle
-
Straight angle → Neutral, natural look
Matching perspective is one of the biggest secrets of professional CB editing. Here is some Picsart Cb Background Hd You Can Use It
Picsart Cb Background Hd
\

Picsart Cb Background Hd
Picsart Cb Background Hd

Picsart Cb Background Hd
Picsart Cb Background Hd
Step 10: Perfect Portrait Setting in Picsart
When editing on Picsart, blending your subject into the CB background correctly is the real art.
How to Blend Naturally
-
Reduce cut-out sharpness slightly
-
Add a soft shadow under the subject
-
Match brightness and contrast using curves
-
Apply the same tone filter on both background and portrait
If your subject has a different color temperature, try a mild teal-orange or green-warm color grade to make both layers match.
Common Mistakes to Avoid
-
Using over-bright cut-outs
-
Not matching perspective or shadow
-
Adding too many filters
-
Using low-quality compressed images
The goal is to make your final photo look natural, not “pasted.”
Step 11: Why This Natural Background Works Well
The image you shared is peaceful and minimal. Its composition — a stone seat, soft green tones, and calm weather — creates a balanced, storytelling atmosphere.
This type of Full HD tree CB background is perfect for:
-
Solo boy portraits
-
Village-theme photos
-
Nature storytelling edits
-
Travel or fashion portraits
-
Bike and lifestyle shots
Because it’s Full HD, it maintains sharpness even after adjustments. The neutral color tone helps portraits blend smoothly.
FAQ – Common Questions About Picsart CB Backgrounds
1) What is Picsart CB Background HD?
It’s a high-quality, creative background used for stylish photo edits in Picsart and other apps.
2) Can beginners use it easily?
Yes. Even new editors can use CB backgrounds to make professional-looking images quickly.
3) Where can we use such photos?
On social media, YouTube thumbnails, posters, or personal branding content.
4) What is the best size for editing?
Full HD (1080p) or higher resolution gives the best clarity.
5) Can it help in building a brand?
Yes. Using consistent background tones builds a recognizable editing style and visual identity.
Conclusion
Using Picsart CB Background HD is one of the easiest ways to make your photos look artistic and high-quality without visiting real locations. From beginners to professionals, everyone can use these digital backgrounds to enhance their creative visuals for Instagram, Facebook, YouTube, or any online platform.
The natural green background you shared proves that a simple, clean Full HD backdrop can transform an ordinary photo into a professional masterpiece.
By matching lighting, angle, and tone — and maintaining a consistent editing style — you can create your own unique signature look and grow as a visual creator.
-
 Ai Photo Editing6 months ago
Top 100 Google Gemini Prompt Boys – Free Copy Paste Prompts
-
 Ai Photo Editing6 months ago
Top 100 Dark Bokeh Gemini Photo Editing Prompt Boy You Must Try
-
 Ai Photo Editing5 months ago
Top 100 Free Gemini Ai Photo Prompt Copy Paste For Girl You Must Try
-

 Ai Photo Editing5 months ago
Top 100 Studio Style Gemini Ai Photo Prompt Copy Paste Boy You Must Try
-

 Ai Photo Editing6 months ago
Top 100 Gemini AI Photo Prompt Boys With Car You Must Try
-
 Ai Photo Editing6 months ago
Top 100 Gemini Bike Pose Prompts – Gemini Prompts For Photo Editing
-
 Ai Photo Editing5 months ago
Top 100 Green Nature Gemini Boy Photo Prompt You Must Try
-
 Ai Photo Editing6 months ago
Top 100 Cinematic Prompt for Gemini AI Boy You Must Try